 |
| Faux stone planter from foam shipping box. |
I'm not sure why they originally invited me to join the local garden club. I'm guessing they hadn't yet spotted my fabulous ability to grow mammoth sized dandelions, and I think my love of creeping Charlie as a ground cover would, if it was possible, get me booted by some of the members (I saw the looks of horror on certain faces when I said I like the little blue flowers), but I've endeared myself to them. My defense of weeds, and my sense of humor are probably not amusing to everyone, but sending the email reminders every month wins me points, as does teaching garden themed craft projects a couple of times a year.
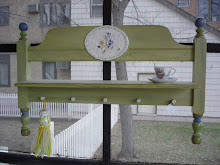
 |
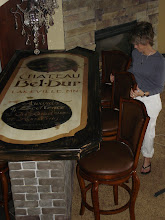
| T.C. helps Mary 2 assemble her bench |
Last night we did two projects. TC helped several of the members make the bench featured a couple of weeks back on the Easter Monday post, and I taught a faux stone planter class. The original directions came from the Scottish Rock Garden Society, though I tweaked them a bit.
 |
| Round up a few supplies |
First, go skulk around the back door of a nearby fish market, awaiting the arrival of the catch of the day, and ask for an empty foam box or two. You might want to buy some fish for dinner while you're there. If you live in a small rural town in the Midwest, about as far from the ocean and big city fish distributors as one can get on this planet, call one of your friends who has a ranch, and ask if they have any of the foam boxes that animal vaccines are shipped in. You can get them from your veterinarian, too, but they will be smaller. Store-bought foam coolers don't work, as they are thinner, and not compressed as densely, so they will crumble.
You will also need a heat gun. The bigger kind used for paint removal works quickest, but the little ones sold for use with embossing inks in the scrapbooking section of the craft store will do the trick.
The other tool you need is a serrated knife, like a steak knife. I was scolded for using my good ones last night, instead of getting some from the thrift store. Um, that's where I bought my good ones. Look, it's soft foam, and they are steak knives that might get used twice a year in my house, so I'm not really worried. Of course, my priorities
are skewed toward the pursuit of creativity, as evidenced by the overflow from my art studio spilling across my antique dining room table, and the paint brushes piled in my dish drainer.
 |
| Recycle junk styro by releasing toxic fumes into the air...hmmm. |
To begin, holding the box over a trash can, take the steak knife, and cut the top edge jagged, then scrape the sides to break up the smooth surface, gouging in a bit here and there. Dust off the crumbs. "Drill" a drainage hole with the knife tip into the bottom of the box. This may be a good moment to pull out the shop vac. If you've never cut up Styrofoam, you'll discover what I mean when you get to this point. :)
Now, go outside for the heat part, because the fumes are toxic. You need to run the heat gun over the entire surface. This will melt it and create realistic rocky texture. Some foam seems to melt kind of beady, but once you have melted it all over, you brush off everything loose, so you will still have a good result.
 |
| Smoosh on the paint. |
Finally, paint it. We used Benjamin Moore maintenance coating, which is an exterior paint designed to stick to metal. It bonds pretty aggressively to all kinds of things (including your hands). Ask your local paint supplier for their version of this (check the oops bin!). Being as it's foam, and will only last a season or two anyway, you can probably get by with using any paint you have on hand. I have a "temporary" sign that I painted with artists acrylics that has stood up to the elements for three years, now.
Some members used a black base, and smooshed dabs of gray and white on top to create a similar look to the sample at the top of this post. Others used a tan base and smooshed on dabs of brown and white, for a more limestone look. You do this wet-on-wet, all with the same brush. Don't be fussy or fancy, because the less perfect you try to make it, the more natural it will look. Don't forget to paint a few inches down the inside of the box. Let 'er dry and bring on the plants!
So, once again, I have maintained my membership in the garden club. This is a good thing, as my newest endeavor is to turn my front yard, which has the only shade in downtown Belle Plaine, into a public-welcome pocket park. Never mind that I'm absolutely not a true gardener. Never mind that my budget for this is just about zero. I know a good dozen gardeners with perennials to divide, and some of them will even take pity on me and help out, if only to prevent me from sneaking in creeping Charlie. Watch for photos later this summer.
As always, if you have questions, feel free to email me
dawnmariedelara@gmail.com. If you want to hire me to paint something lovely in your home, check out my website at
theartofthehome.com.


No comments:
Post a Comment