Ornamental Plaster Sculpting, Mural Painting, Faux Finishing, and Imaginative Interior Design.

Ornamental Plaster Sculpting, Mural Painting, Faux Finishing, and Imaginative Interior Design.
CLICK ON THE RABBIT ( yes, those are cabinets) TO SEE MY PORTFOLIO, AND LEARN MORE ABOUT MY SERVICES...theartofthehome.com

Wednesday, August 31, 2011

Come into the drawing room

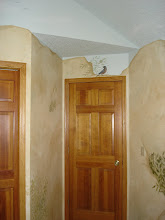
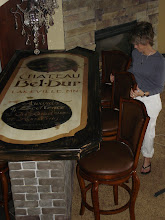
I have to admit that it pleases me that my studio is in the room originally designated as the "drawing room", in my 1906 house, Belle Ami.  That was actually shortened from "withdrawing room", as the ladies' parlour was known in previous centuries.  You thought the formal living room with separate family room is some modern invention of the 1970's?  Nope.  During the war years and the years shortly after, American homes were built pretty modest, and often had just a "front room", but prior to that, homes had a formal parlour for entertaining guests, and a family parlour (called the drawing room), for more casual activity.  These days, Emmaline Conlin Whitlock's drawing room is full of pretty casual activity, indeed, but Whitlock women were champions of art, education, and women's right to vote, so I have an idea they would approve of the Artgirls. 

This week, we worked on learning to draw faces.  I've included a diagram here, so all of you who say drawing is a magical gift, bestowed by the gods upon only a rare few, can see how simple it actually is.  The trick is to start your drawing with the general outline of the face, with the measurement lines lightly penciled in, then go feature by feature on a photo you would like to reproduce, and notice how the subjects' features relate to the placement lines.  We found this actress is pretty typical, which you will find on most model faces, because that's what makes them conventionally "beautiful", though her eyebrows are closer to her eyes than some.


Faces 101:  Eyes sit on top of the 1/2 line on an adult head.  The most common mistake people make is positioning them too close to the top.  Top of brows, and tip of nose land on about the 1/3 marks.  Divide the bottom third in thirds, and there you have the placement  of the mouth and chin dent.  Faces are about five eyes wide, typically with one eye width between eyes.  Nostrils flare about this wide, and corners of mouths fall about straight below pupils.  Ears stick out between eyes and tip of nose.  Start with this, and then learn to notice the variations. 
You can click on this photo to enlarge. 
 
Faithie, a beautiful bird painted on her cheek, particularly noticed the things the makeup artist tried to downplay, especially around the nose.  She has taken to carrying this notebook, and drawing faces every day.  This really pleases me, as the drawing part of art class is not her favorite.  She prefers building and sculpting.

Kadence, on the other hand, is working on the same project we started months ago, because she would rather spend most of her class drawing.  She's the fashion designer from my Valentine's Day post, but has already nixed that profession.  She's planning on something scientific, now.  The formula for face drawing appealed to her, but her fashion loving side still showed, I thought, in her willingness to focus on the features as they were played up by the make-up artist. 


Faithie's finished drawing.  This is a nine year old, after just a couple of weeks of practice.  Don't tell me you can't do this.

Kadence's nearly finished drawing.  She chose to add color, as any crayon loving eight-year-old would.
 And what did I learn from the Artgirls this week?  Nothing new.  Just a reminder that we all see people from our own unique perspective, and we can choose to see what's camouflaged, or we can choose to see them as they wish to be seen, and either way is right.  Now, go get a pencil, and grab a nice big clear photo, preferably one from a magazine that you can draw lines on, and try this yourself.  Really.  It's not a test.  No one has to see.  It's fun.  Just try it!  Okay, I'll stop here, before I start sounding like Sam-I-Am from Green Eggs and Ham...would you, could you in a ...!

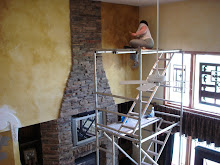
When I'm not teaching Artgirls, and trying to convince clients to test out their artsy-craftsy talents, I paint and sculpt some pretty nice walls for folks, and your walls could be next.  You can see my portfolio and services at theartofthehome.com.

Need anything clarified in the instructions above?  Email me, and I'll do my best to answer any questions.  dawnmariedelara.@gmail.com


Tuesday, August 30, 2011

There are peacocks in this bramble patch...

The weekend started early for me, and still flew by.  I turned more perfectly nice green cinder blocks into crumbling brown stone, at Cindy Faus Heimerl's barn (scroll down a couple of posts to "Once Upon a Time..."), and here at Belle Amie, I've turned a lovely periwinkle blue bathroom wall old and splotchy, and then cut grooves in it.  Why?  Mmmm... because I can?

It was a perfectly pretty periwinkle blue bathroom, just needed a bit of fancy on the shower curtain, some baseboard trim...
Now see, the bathroom could have been nearly done.  A little baseboard trim, some fluff of a valance over the shower curtain with a window curtain to match, a little texture on the ceiling to cover old cracks, and in under a week, a finished space.  Charming, photogenic, and plenty original, thanks to a lovely old dressing table turned vanity, with a painted marble counter that I did a few years back.  I was easily on the home stretch, and the road didn't even diverge.  It was an obvious straight shot home, but did I take it?  No.  I gleefully, willfully, knowing full well that this will not be a quick trip, dove headlong into the brambles.

First I trowelled a pale aqua and a dusky purple, along with off white over the periwinkle, and liked the idea, but it was too gloomy.  I was envisioning an artists painting of old plaster, catching interesting light, and these colors weren't suggesting any sort of glow.  I took a break to go quote a job where wallpaper had been removed from an old stairway, and amazingly, what they wanted to cover up was almost exactly what I had spent the day trying to create!  Still wanted a bit more color though, so I flipped through files of magazine clippings, and found several showing old European buildings with rosy pink plaster, glowing in the sun.


Chalking in is the first step for sculpting plaster details.  Actually, the first step is making sure you like the background paint, as it's a lot harder to change afterwards.

I pulled a few colors of "oops" paint from the basement stash, and started again.  A little trowel, a little brush, a little Woolie to blend the edges, seven colors of paint, two pots of coffee, three hours of sleep, and two audio books later... beautifully ruined walls!  I love them.  I really have nothing against solid color paint.  A few rooms in my house still have it (for now).  I just tend to prefer my colors a little overripe, and to my eye, that's best achieved by mixing them on the wall.

Once the design is balanced, I cut away the paint where I want the plaster to stick.  I don't know for sure, but I just suspect it will bite better into raw plaster/gypsum board than paint, so I always do this step. I also use Weld-Bond glue, which is a concrete bonding agent, to reinforce the connection..
Of course, this is only the backdrop for the detail work I've been planning in here for awhile.  I've done several versions of squash blossom scroll work with hummingbird accents in client's homes, and had thought I might put it in the upper hallway here, but I think the plan instead might be giant painted flowers coming up the stairs and across the hall ceiling (this could change, but that's the current infatuation).  The bathroom was the next logical spot.  It took me some time (during which I took a time-out at Maureen's-scroll down to the last post) to figure out a good design, combining an art nouveau layout with a traditionally baroque style of plaster.  I've sort of met in the middle, and in the early stages, it's looking promising.  It better be, since it's permanent!

So, here's the first bit of sculpting started.  Using an air dry paper clay, which closely mimics the material variously described as plaster and papier mache in antique decorating books, I sculpt the design directly on the walls.  When doing a mirror image like this, I try to alternate between one side and the other.  They are never identical, but this keeps them balanced.
How long will it take?  Anybody's guess.  I have completely given up on guessing when the basic decorating of this place will be done.  The sculpture coming out of the living room wall (the wall that was perfectly fine without a sculpture coming out of it) is finally cooperating, and underway again; the design for the exercise/dance studio has come together, so I'm collecting bits and pieces for that project; I've figured out another layer to add to the ceiling trim in the art studio, and I'm sure of only one thing...at every fork in the road to completion, I will once again look both ways, and then go hiking off through the brambles. 

If you think you might like hand sculpted plaster details, or overripe wall color in your home, you will find more samples, and information on how to hire me, on my website, theartofthehome.com.

Trying something like this yourself?  If you have questions, feel free to email me, and I'll do my best to answer them.  dawnmariedelara.@gmail.com

Saturday, August 27, 2011

Attitude Schmattitude

Today was not my most productive day ever.  After struggling all day to perfect the background for a sculpted plaster feature here in my own house, I ran out of time to do the actual sculpting, about the same time I realized that the design I planned was not going to work with the mirror and light fixtures it's meant to accent.  Luckily, I hit the frustration point about the time I needed to leave for Open Studio at Maureen Carlson's Center for Creative Arts (maureencarlson.com), just up the highway in Jordan.  My friend Barb Kobe (barbkobe.com) had suggested we meet there to make paper dolls.  It was the attitude adjustment I needed.
Even though open studio is not supposed to include instruction, Barb loves to teach, and share new materials.

Renee was passing through the Twin Cities area, this evening, moving from Missouri to Tacoma, Washington.  A friend who once took a Barb Kobe class at Maureen's suggested she check on her way through to see if there was anything on this weekend.  Getting to not only meet both of these women, but also getting an impromptu Kobe mini-class was more than she ever expected!

Maureen worked on a project of her own, and joined in the laughs.

Kae, a photographer at the nearby Renaissance Festival, worked on prepping her equipment for shooting tomorrow, while Renee Carlson hung out and worked on a collage project started in a class a few months back.  Don't let Kae's sweet look fool you.  She was the instigator of a whole lot of the bawdy humor that had us laughing so hard.

Kit comes down from north of the cities every now and again.  She wasn't planning to get in on the paper doll project, but we were having such fun she couldn't resist.

Renee the Traveler's healing bird dolls.  She's a painter/mixed media artist, (whose work I meant to photo, oops), but she had never done anything quite like this.  We usually try to behave better, especially around new people, but Renee, fitting right in from the moment she arrived, threw plenty of zingers into the fray, helping to keep the laughter going.

Paper doll play by Barb Kobe (barbkobe.com)

This was the doll I started.  (No, of course I didn't finish)   Somehow, she came out a little, well, "passionate", and once the others started posing her, it turned into one of those truly awfully funny running jokes that had all the women shrieking with laughter, and the whole thing just went downhill from there. She'll go in my visual journal, collaged over the map Barb pulled at random out of a box of old National Geographics, as I was packing to go.  What she means I probably don't even want to explore, but she'll always be a reminder of one of those rare evenings where the laughter just rolled, among a combination of women not likely to ever convene again. 

When I'm not having an attitude adjustment at Maureen's, I can often be found painting and sculpting home decor for clients.  Check out the website theartofthehome.com to see my portfolio.

If you have DIY or decorating questions, email me at dawnmariedelara@gmail.com, and I'll do my best to answer them.

Wednesday, August 24, 2011

Judgement is in the eye of the beholder. Beauty is soul deep.


So many times when I start a design consultation, clients apologize for their furnishings.  "Do you think this lamp is funny looking?  I got it at a garage sale."  Personally, I thought that particular lamp was classic, and large enough to stand out as a sculptural element in the room, which made it interesting.  But what I thought of the lamp, or anyone else's furnishings, really doesn't matter.  Take a look at the things you have with your own eyes.  Stop for one minute please, the silly chatter that goes on and on about what's in fashion this season, and what will your mother think of the drapes, and should you take your neighbor's advice about changing the sofa that you actually love.

I'll probably reupholster this 1920's chair eventually, but for now, I love its shabby elegance, and the remnants of moss-green mohair upholstery. 
That's all that matters.  That you love the sofa.  Do the drapes make you happy?  Will you love this season's colors when they aren't the latest fashion?  Easy way to answer the last question:  20 years ago, the last time this season's look was fashionable, did you love it then?  Do you actually have coordinating items stashed somewhere in your home?  Yes?  Spring for this season's fashion.  Otherwise, smugly remind yourself how much money you are not wasting on stuff you would donate to charity in a year.

This mirror was foxed, with alligatored varnish on the frame.  I added the words, inspired by a quote from another artist.
At their best, our homes mirror our truest, most beautiful selves.  The last few blog posts included pictures of a few of us women, ranging from late twenties to early fifties.  None of us was dressed for a photo shoot, none of us had our hair done, nor make-up on, and though we made the usual "Oh, I'm not looking glamorous" noises, none of us really gave a rip.  So, you saw the real us?  The hard-working, laughter-loving, too-busy-living-life-to-spruce-up-and-pose women that we are.  Of course we would prefer that you think us beautiful, just as we hope those who visit our unique homes find them beautiful, but we know the truth.  Beauty is soul deep, judgement is in the eye of the beholder, and what you think of us is none of our concern.  We give our beautiful best to the world every day, we welcome others into our homes with generosity of spirit, and those who can't feel the sunshine in our smiles, we simply wish them well on their journey.

Margery Williams, author of the velveteen rabbit, summed it up perfectly...

Timothy and Puff have been real for decades.
"Because once you are real, you can't be ugly, except to people who don't understand."

As long as your home is beautiful to you, and the objects in it hold significance for you, the people who understand who you are will see it's beauty. 

If you are still living with the color that your sister swore you would grow to love, and think perhaps now is the time to change it, check out my portfolio and services at theartofthehome.com.

If you have DIY or design questions you think I might be able to answer, feel welcome to email me at dawnmariedelara@gmail.com.


Monday, August 22, 2011

Once upon a time, they lived happily ever after.

And they said I couldn't edit my ramblings!  I told the whole story in one sentence, right there, didn't I?  Not exactly?  Okay.  You're right, the story is never that simple.

My friend, Cindy Faus Heimerl, is a wedding officiant, and the owner of Marion's Place, and Rubies & Rust (click here for info atmarionsplace.com).  Both are enchanting event locations on the same property, on the hill above Belle Plaine.  Marion's Place is the restored farm house, and Rubies & Rust is the barn. But this is a barn like no other, as you might have guessed from the photo above.  Yup, this is a barn with chandeliers.

Before:  mint green cinder block wall.

After:  Cheatie faux stone wall.
So, that's where the story starts.  The barn was pretty well fluffed upstairs, and had hosted teas and gatherings, art sales, an open mic night, and Glamour Camping (it used to be a barn with chandeliers and a whole buncha beds, for grown-up girl slumber parties).  The ground floor had cool furnishings, but it also still had partial dirt floors, and the dropped center of a dairy barn.  Cindy had cleaned and painted, but it was still not the most functional of spaces, and still a little whiffier than a retired barn needs to be. 

Wanting a more interesting place to perform weddings than many of the venues non-traditional brides were renting, Cindy decided it was time to kick it up a notch, and called in the big guns.  She called in her favorite contractor to bring the concrete floor up to level, the staircase up to code, and spray this main level ceiling white.  Their work was beautiful, but the soft mint green walls, which had looked so fresh against the barn wood and dirt, now looked like sad, hospital green.  Eeewww!  So, she called in the other big gun:  Me.  Hmm, well, I'm more like a big splash of happy than a big gun, but on with the story....

Left-overs and free "oops" paint kept this project on budget, and using them up on friends' projects keeps my storage room from overflowing.
I emailed her a photo of a loft with gorgeous stone walls, and asked if this is what she was dreaming of.  Her reply, "Yes, but isn't that a lot of work?",  I brushed off with "We'll do the quick 'cheatie' version."  (this is where the soundtrack plays the ominous, "famous last words" kind of music, in case you don't know me, or haven't been following this blog very long.)  I raided my stash of leftover paint for every can of beige and brown, grabbed the tub of tools, and with the promise of coffee and bagels, headed up bright and early yesterday morning.  Well, bright and a little later than planned, but still long before the church bells started in.
Cindy Faus Heimerl, wedding officiant, barn owner, artist, aging-parent companion extraordinaire, and general laborer.   The woman does it all with a smile!
Having been painted just a couple years ago, the walls were mostly prepped, but some exposed concrete block still showed, and at the likeliest to get wet places at the bottom of the wall, so Cindy primed while I stirred up a batch of tan for the base coat.  If you paint cinder block walls, especially at or below ground level, absolutely spring for primer designed especially for this.  Otherwise, you're wasting your time on the pretty stuff, and you will have a bigger mess trying to seal them later, when the paint is half flaked off and mildewed. 

I started the tan base coat while Cindy finished the primer, then while she ran for lunch, I tested the glaze, which was really full strength dark brown paint, smeared into the grooves, then scumbled out with a damp rag.  Quick, easy drama, but it needed a little more depth, so I grabbed some left over ivory paint and thinned it a bit.  Using a Woolie tool lightly dipped in this white, I was able to pat highlights on very precisely, then blotted them slightly with the damp rag, to settle them into the shading.   A sponge would do the same, but the Woolie can give you sharp edges, saving lots of time
Yup, that's me, in my usual fashionable attire, and my usual "If I don't look at the wall behind me, I won't have to think about how long this is gonna take me" trepidation showing clearly on my face. 
At this point, my suspicion was confirmed.  Though not a precise technique, and though we weren't going to spend the time to create realistic stone, painting both sides and one end of a sixty foot space (thankfully, we were only painting just past half of the length of the barn!), was going to take a little longer than we had hoped.  This does not surprise you at all, does it, Dear Readers?
Concrete block turned into a warmer faux stone.  If you have time to spend, chips and angles can be shaded in, giving a completely realistic effect. 

Simon the Supervisor, and guardian of all things edible.

Luckily, we had Simon to supervise us, some good music to listen to, and family stories we hadn't yet shared, so it was a pleasant way to spend a rainy morning, and a long afternoon.  Okay, a reeeeaaaaallly long afternoon, as we kept going until about 9:30p.m.  We didn't finish, but the base coat is pretty much complete, and the top glaze is nigh on half done, so it will be ready in plenty of time for the open house.

What?  Yes, you can come see it in person!  Okay, maybe you folks in Belgium and Ireland and South Africa and Moldova (and all those other countries about 7 timezones away) will think it a bit far to travel for an afternoon of entertainment in a barn (with chandeliers), but anyone in the Twin Cities area will want to come...

A sneak peek at the upstairs decor. 

Save the date for Sunday, September 18th. There will be refreshments, a variety of entertainment, and lots of chandeliers (yes, I am especially fond of the chandeliers).  Cindy has asked me to write something witty yet thoughtful, on the topic of weddings or marriage, to read to you all.  I'm not sure my experiences are quite what brides-to-be want to hear, so this may be a bit of a challenge. Should I fail to come up with something, not to worry, I'll still be around to say "hi", and enjoy the other entertainment with you.
If you don't happen to need your barn decorated, you still might want to see what I can do for your house.  Check out my portfolio and services at theartofthehome.com.

Questions about a decorating project you're tackling yourself?  email me at dawnmariedelara@gmail.com, and I'll do my best to answer them.

Friday, August 19, 2011

Norman Rockwell could have painted my week.

It's been a week of Minnesota summer projects.  I painted and lettered a swing set, painted a drab basement floor with a cheery marble pattern, for a sweet lady who fed me pie and memories of a mama who made soap, and this weekend, I'll be missing the Henderson Hummingbird Festival, to consult on turning a 70's modern lakehouse into a charming lakeside cottage, then painting a friend's barn on Sunday.  If the list of projects doesn't say "small town Minnesota", this photo pretty much screams it:
You know it's August in Belle Plaine when the corn wagon shows up!

...and you know you're someplace pretty fine, when this is the payment method.  Yeah, this is my town. Click on photo to enlarge.

August is a great time to paint the new swing set...

...or to get the client's child to paint it for you!

Brenda took a break from canning tomatoes to check on our supervisor, Ava, who kept an eye on Brooke and I from the sandbox.

Having finished the job by the headlights of my van, this could easily have been me.
 
I snapped photos of the swing set, illuminated by the headlights of my van, but they didn't quite cut it.  I'll be popping back over there this next week for touch-ups, so I'll get some daylight shots of the lettering and art.  Speaking of art, if you follow this blog, and are wondering about the sculpture I started a few weeks back, she's underway, but slightly stalled, while I figure out some angles and mural details (see "With Friends Like These").  I'll have progress to post on that late next week.

Now, I don't normally paint swing sets, but I do paint a lot of other stuff.  See my portfolio at theartofthehome.com, where you will also find all the information on how to hire me, or if I don't do what you are looking for, click on the page titled "Links to Other Artists" for everything from plain painters to fine sculptors.

If you have questions about paint or paint projects, feel free to ask me, and I'll answer whatever I can.  dawnmariedelara@gmail.com.

Wednesday, August 17, 2011

This post could save you more than $120/year

My friend Pamela Pomplun-Morgan is not only an excellent massage therapist (check out healingessencemassage.com, if you are in the Belle Plaine / Arlington area), she's also pretty smart.  Awhile back, she told a bunch of us about a recipe for making laundry soap.  Unlike the commercial stuff, this one doesn't fade your clothes, has pretty eco-friendly ingredients, and best of all, for about the cost of one bottle of Tide, you have the ingredients for more than 18 gallons, which saves you about $120 around here.  I can think of more interesting things to do with $120 than dump it down the drain.  All the ingredients can be found in the laundry aisle at the supermarket.  It took me about 20 minutes to make a double batch.
1/2 bar Ivory Soap
1/2 cup Borax (20 Mule Team)
1/2 cup washing soda (this is different than baking soda)
Water
Essential Oil (optional)

Put 6 cups hot water into a 6 quart pot.  Grate the Ivory soap into the water, and heat on medium until dissolved.

Add Borax and Washing soda, and remove from heat.  Add 3 cups of cold water and stir until it dissolves and thickens (this part seemed pretty magical to me!).  Add up to 1/2 oz. of your favorite essential oil.  Divide into three 1-gallon jugs, and top with water.  I used recycled laundry soap bottles, which aren't gallon sized, so I did go a little lighter on the water to fit it all in.  It seems the normal consistency, so you might want to experiment with a little less water, but know that this thickens more as it cools, so don't leave it too thick, or it may not pour!  Shake to blend, and shake before using, as it will separate. 

Use about 1/2 cup per load.  I used a bit to pre-treat an orange grease stain, not really expecting the color to come out, but it did, and after accidentally leaving a load in the washer all day, even in the heat, no funny locker room smell, so I give this my Good (Enough) Housekeeping Seal of Approval.

If you use essential oil, use a clear oil only, as colored oils can stain.  Having said that, I'll now confess that I only had lemongrass oil on hand, and it's yellow, so I added just a couple of drops to the whole double batch.  The fragrance is very soft, but it's enough to scent the entire house, while my just-washed paint clothes are draped all over the saw horses left in the dining room, from Artgirl Faithie's shelf building project. 

Yes, that's still under way.  Her big brother moved out, so she's getting an art room of her own, which involves rearranging their basement, before installing her shelves.  And yes, I usually dry my laundry in my basement, but my friend Carol is moving to a smaller place, and her party-art materials (a.k.a. The Glitter Factory) are coming to live here, which means my whole basement is getting rearranged, too.  Needless to say, I'm not having company for dinner this week, which is just as well, since the only thing I've cooked up is laundry soap.

Here's a bonus:  Do you use an Oxy type product in place of bleach?  Did you know you are basically paying big bucks for hydrogen peroxide, which is about 99cents in the next aisle? 

Mix 1 cup of hydrogen peroxide, 3 tablespoons of lemon juice, and 15 cups of water, and store in a gallon jug.  Use about a cup in a load to combat dinginess.  Keeps 3-6 months.  (that's the official recipe.  Personally, I just splash the peroxide straight from the bottle, a few tablespoonfuls, straight into the wash water, a little more if the socks are grubby)

I have often used full strength peroxide successfully to remove blood and colored stains.  At full strength, it can lighten fabrics, so use sparingly and rinse immediately.  It is after all what makes blondes, blonde, when nature doesn't.

That's about my quota for cleaning advice for the whole year.  I'm finishing a couple of paint projects over the next two days, so there should be photos to post on Friday.

When not sharing useful household tips, I do paint some pretty nice walls.  Check out the portfolio at theartofthehome.com.

If you want more cleaning tips, google Martha.  If you are working on a decorating project and think I might be able to answer your questions, email me at dawnmariedelara@gmail.com

Monday, August 15, 2011

Simple stripes?

There's nothing very tricky about painting stripes, except maybe choosing what kind, size and color of stripes you want.  I painted a living room last week that needed to coordinate with a Woolied entry hall and kitchen, but not just be more of the same.  Looking around the room, I noticed that Karen and Bernie's furnishings had a lot of vertical lines, which hinted to me that they might like stripes.  The scale and style of the space called for something not-too-skinny, nor too busy, so the concept was wide and subtle...but not too subtle...nor too dark.  I made three different samples, using the same palette of colors, and we still ended up doing choice number four. 

Technique 1:  Woolie, mask stripes, re-Woolie with exact same colors and technique.  These can be almost no contrast, as shown, or very high contrast, depending on the proportions of the colors used.  We were going for subtle, but Bernie thought this was too subtle.

Technique 2:  Solid background with ragged/scumbled glaze over.  I offered this option in case they wanted to add a richer color to the room, but still be subtle.  Bernie thought this was too dark, proving that not all men want to live in a cave.
   
Technique 3:  Woolie base with stripes of the darkest color from the blend glazed over the top.  Bernie thought this was just (about) right.

Technique 4:  Woolied base with white glazed stripes scumbled over.  Unlike wallpaper, paint allows you to change the color half-way through the job,  keeping particular customers, like Bernie, very happy...right, Bernie?

Matching adjoining rooms isn't always necessary, but it made the most sense in this house.  Stripes keep it from being too matched.
 Need something just right for your home, and need to see it to know it?  I would be happy to design samples to narrow down the possibilities.  Check out my website for information on how to hire me.  Theartofthehome.com.

Want to paint your own stripes?  If you need a little more guidance than I've given here, feel free to email me.  I'll be happy to give you all the info you need to create your perfect pattern. dawnmariedelara.@gmail.com

Friday, August 12, 2011

Heaven. It was Heaven...

You don't think this looks like Heaven?  You are obviously not a junker, alley shopper, or dumpster diva, and probably not a  mixed media artist.  This really unfocused photo (sorry, I even tweaked it, and this is as good as it gets.  I was just too excited about the treasures to slow down for photos) is the warehouse for the Zero Landfill Harvest, and there are three more days of it.  Click on this link: zerolandfilltwincities.wordpress.com for all the info, as I don't want to risk typing it wrong, thus sending you there on the wrong day or time. 

Basically, it is a bunch of designer samples of fabric, tile, wallpaper, carpet and more, plus tons of three ring binders, cardboard tubes, and interesting miscellaneous to make your creative juices gurgle in anticipation.  And it's free to anyone who shows up.

There were piles of carpet samples.  Don't get attached to the one on top, because the toes next to it, belonging to a small girl named Madison, took it home. 
I spent about half an hour sorting through a box of tiles with Madison.  Luckily, she mostly liked things I didn't want, although she giggled merrily every time she scored a good one that I was reaching for.  Lucky for her, I'm not one of those insane women you hear of at the After Christmas Sales, who trample small children to get at the best deals.  We had a good time discussing bedroom color preferences, her aunt's insistence on coming up with craft projects for her to try, and her absolute conviction that she is not an artist and doesn't want to be.  Seven-year-olds are fun to hang out with.  Of course, she laughed at my jokes, so I would think this.

These tiles are mostly for a mosaic I want to do around my bathtub.  It will take me a good while to collect enough stuff to start, so don't be holding your breath!

I would use the stone tile samples for coasters, but I don't really need coasters.  I mostly wanted them for samples of marble choices I can paint for clients.  Madison and I were both collecting the blue brick shaped ones.  I did resist the urge to distract her and steal the ones she had put in her box...barely.

I don't really have a plan for the fabric samples.  They were about to close, by the time I finished sorting through the tile, so I just went through the top of one fabric box, frantically pulling things in colors that fit my palette, and that were big enough to use in patchwork pillows and the like.  Some of the smaller pieces will be used in collage projects, and for covering journals, and  I'm sure the Artgirls will have lots of ideas for anything I don't use.

These old roof tiles looked like the base for an interesting mixed media piece.  I'm not sure what goes in front, but perhaps a big cog wheel, and some other rusty bits, turned into a clock.  I need some less-pretty/more-funky pieces around here, before this house gets too sugary sweet. 

So there you have it.  My idea of Heaven.  If you think this is a little odd, you should see me on community garage sale weekend!  I get positively giddy at the sight of all those knick-knacks waiting to be smashed for china mosaics, and the gloomy old furniture just begging for paint and tassels.  All the girly-girls can quit worrying about me beating them to the mall, unless Sears is having a sale on power tools.  I am the Dumpster Diva, Queen of the Alley Shoppers, and a Master Junker...see you on the search!

If you want to see some of the things I've done for clients with salvaged bits, check out my website, theartofthehome.com, and in particular, the page titled Cabinets and Furniture.  On it are cabinets crowned in old headboards, which you would never recognize as such, silver salt and pepper shakers repurposed as cabinet knobs, several pieces of painted furniture, and a china mosaic fireplace that I wish was mine. 

If you are doing a reclaimed project yourself and run into questions, feel welcome to email me.  If I have answers or ideas, I'll be happy to share. dawnmariedelara@gmail.com.


Wednesday, August 10, 2011

Out Damned Spot!

Since I haven't completed a single photogenic project yet this week (not that I haven't been working long crazy hours, just that I haven't finished anything pretty), I think this is a good night to answer the most common question I get, "How do I get paint out of this _______?"

"This" can be anything from the carpet to the brand new blouse that you didn't mean to wear into the art room, but you were just running in for a second to grab something, and you remembered you still needed to sign that last thing you painted, and ...other people do this, right?

Basically, the remover depends on the paint, and not so much on the item it's stuck to.  If it's oil based paint, which is pretty rare these days, it will come out with mineral spirits when wet, and with acetone (nail polish remover) when dry.  It will nearly always stain.

If it's latex/acrylic, it comes out with water when wet, and with denatured or rubbing alcohol when dry.  You can usually get the stain completely out.  I'll focus on latex, but if it's an oil paint stain, follow the directions, using the products listed above.

First, wet or dry, isolate the area.  If it's in carpet (and a small drop), pull the clean fibers aside and use masking tape to cover them and hold them apart.  If it's on your honeycomb blinds, slip rolled up paper towel inside the section, so the paint can't soak through to the other side.  Same idea on clothing.  Once you start working on the stain, you can easily force the paint through a few layers, so don't risk spreading the stain from the front of your favorite blouse to the back of it.

Now, If it's still wet, dab carefully, using a clean area of rag/paper towel every time you touch the spot.  If you force the paint through into towelling behind, carefully remove that, and replace it, as it will just spread back in with the next step if you don't.

Then, using something about the size of the drip (cotton swab, towel-wrapped finger tip, bath towel - wait, no, that comes in later, when we talk about gallons and carpets), dipped in water, start dabbing, then blotting dry with paper towel or tissue.  Dab, blot, dab, blot, dab, blot, remove and replace the towelling behind, repeat.  Do NOT rub.  Rubbing works it deep into fibers, and spreads it.  Work slow and patient.  Better to be caught trying to get the stain out of the blouse that is in fact your sister's, than to make a bigger mess that might not come out.  In carpet, you may want to use a water bottle with a pull spout to squirt drops of water down into the base, to float the paint up.  Just use a little bit at a time, and don't over-saturate, until nothing else works.

On synthetic fibers, this will about do the trick.  If it seems the paint is really all gone, but you see a faint stain, like from dye, you can usually remove this with a little soap and water.  At this point, you will need to rub to work the soap down into the fibers, then rinse and blot.  If it's still stained, you can try dabbing with an Oxy type laundry or carpet product, hydrogen peroxide or bleach.  Thing is, if they will remove the trace of dye, they may well remove the original color in the fabric.  Test first somewhere it won't show.

For dry paint stains, first see if you can peel off any of it.  If on carpet, is it only on the tips of a few fibers?  In this case, use manicure scissors, and using more of a shaving motion than a cutting one, carefully trim/scrape out the spot.  Do not cut down into the pile of the carpet!  This technique is for when the stain is just right on the tips of the surface!

To remove the remainder of the stain, dab carefully with denatured or rubbing alcohol.  You may want to saturate a rag and just hold it against the paint blob for a minute, to soften it.  Just like with water, dab, blot, dab, blot ....remove towelling and replace.  Repeat until clean.  Dab with peroxide, if needed to remove any residual color.

So, what if it's a big splash of paint on carpet, from the can that tipped, or the loaded brush that flipped out of your hand, into the middle of the room?  First, stay calm.  It's nobody's fault.  There are paint gremlins that cause this, just for sport, only to watch you panic then beat yourself up, or even more entertaining for them, to hear you yell at the person who already feels terrible about it happening.  Don't entertain the gremlins.  It's like feeding the bears.  It encourages them to hang around and mess up everything.

Start by scooping the paint up with a large spoon, spatula, spackling knife, or whatever, then  blot the area repeatedly, until nothing more blots up.  Next, working on a bit at a time, flood the area with a little water, and blot.  BE CAREFUL.  Too much water at once will just cause the mess to spread.  If your carpet is newer, and especially commercial, this will do the trick completely.  If not, you may want to use a carpet shampooer to finish cleaning it, in which case keep the spot covered and damp for the couple of hours it takes to run and rent one.  The suction of those things will pull out the last of it.

To avoid these problems in the future, work out of small containers (not the full can), use large enough drop cloths, wrap curtains in plastic or take them down completely, and to keep your clothes clean, paint nude.  I haven't tried the last tip, so I make no guarantees as to the advisability of this.  You might simply want to keep your mitts off of your sister's wardrobe, and to protect your own, set aside your comfiest sweats to be dedicated paint clothes. 

If you just don't want to risk making spots on anything to begin with, you can always hire me.  My portfolio can be seen at theartofthehome.com

If you have any painting questions, feel free to email me at dawnmariedelara@gmail.com, and I will be happy to answer them to the best of my ability.  Really.  As much as I would love for all of you who read this to hire me, I'm truly just as pleased to know that you were inspired to try it yourself.  Everyone should have as much fun as I do, and wouldn't the world be an even more colorful place if everyone had favorite painting clothes!?


Tuesday, August 9, 2011

Walking into Doors

I popped over to the library a few days ago to use their printer, which is way better than mine.  Crossing the street, I saw the librarian and a man in earnest conversation, looking at the door.  Georgine spotted me and exclaimed "Ask Dawn-Marie!  She's a painter!" to which I replied "Ask me what?"

Cranberry door with Chamois frame or Chamois door with Cranberry frame?  Sample boards cut to fit are the easiest and surest way to know what the paint is going to look like.

They wanted to know what paint the man should use on the door, and when I started with recommending they re-prime it with Zinsser or Benjamin Moore Stix, due to the number of years it had weathered since it was installed, he grumbled about not doing three coats, and when I suggested they use Benjamin Moore Super Spec to paint it, he grumbled louder about having to drive several miles to get that. I shrugged and said I thought that since it gets a lot of use, I would use the best quality products, at which point I was handed the work order and the paint sample color, and told to knock myself out.

Wha...? Bu...? Ummmm, did I ask for that? I'm quite sure I did not. I don't actually do straight paint, but the look of relief on the librarian's face made me accept. There was apparently a need for her to spend most of her day off, guarding the doors against children, while he painted, and since I live across the street, and keep even stranger hours than our little library, perhaps I could manage it without her there? Guess that's where you'll be finding me in the early mornings this week, before going off to my previously scheduled paint work. They say you should look carefully before crossing the street, and I think I'll take that to heart, from now on!


Final choice:  Chamois door frame, Cranberry door, and white window trim, since all the windows on the building have white trim.  Color names are descriptive, and not actual Benjamin Moore colors.  I matched them to the brick, as close as possible, and will adjust them to suit before actually painting.


Saturday, August 6, 2011

With Friends Like These...

(You know the rest)...who needs enemies? 

This is the third installment in the story of a sculpture that started a few posts back, in the one titled, "In process".
City Hall's entry in the planter competition was one of about twenty-five.  Downtown Belle Plaine really blossomed this summer.

After a long day of putting together quotes for jobs, and judging the Chamber of Commerce downtown planter competition, I headed up the road to Jordan, for my usual Friday night at Maureen's (maureencarlson.com), for Open Studio.  I took the torso of Lisa, and the head I started last week, and stopped at the hardware store to find something to create the arm and leg structure.  I was thinking of aluminum tubing, but they didn't have it, and after awhile, I decided the old standby, chicken wire, was the best bet.  Crumpled slightly and rolled up, it makes a strong but lightweight armature to either fill with spray foam insulation, or cover with plaster bandages.

Once at the studio, I sat on the floor to explain the pose I thought she might have, while Maureen and her daughter Renee asked me more about the story of the Gwragedd Anwnn, and threw out suggestions and ideas.  I told them how, now that she was amphibious, she would probably display fine in my plant-filled living room (not so much an option when I thought she might be a mermaid), then laughed and said of course that would also probably mean changing the mural, just a little.  Maureen got that sneaky twinkle in her eye and said, "You knoooooow, you could make her coming out of the wall, part painted and part sculpted."

Mm-hmm.  Like I haven't added three layers of challenge to this little project already.  I tried to steer away from that idea, but deep down, it had already taken root.  It would simplify sculpting her legs (most likely), it would solve the dilemma of how to display her without displacing furniture, and it will once again double the time this project will take to complete. "Aaaaaaaggghhhh!", to quote Charlie Brown.

Now, before I can move forward with sculpting, I not only have to figure out arms and legs, I have to figure out how much of the existing mural will get repainted, to incorporate her, and how. 
Maureen does this every time, and though it seems innocent, I'm not sure it isn't on purpose.  I sit there proposing some simple solution, some quick project, and if I can't manage to triple the complexity myself, in thirty seconds or less, she jumps right in.  She can read her students, even when they are just hanging out as friends, and knows instinctively when they need a push.  She never lets me get away with doing what I've done before, and I swear she gets a kick out of pushing me, then jumping back to see where I land.

So, I probably don't need to figure out leg structure, as she is likely to be leaning forward, out of the picture, and very little leg will be dimensional, but with all the time saved, I now get to take my trompe l'oeil painting to the next level.  Thanks for saving me from the dreaded legs, Maureen, I wouldn't have done it without you!

(...and yes, Maureen, Dearheart, I only pretended not to hear what you said about writing a story.  Thanks.  I needed another to add to the growing pile of unfinished books, though of course, I nearly always make up back stories for the more creative jobs I do, so it will probably happen anyway.)

I do paint murals and sculpt dimensional plaster for clients.  Find my portfolio, and information to commission me, on my website, theartofthehome.com.

I will gladly answer your questions, if I know the answer you are looking for.  dawnmariedelara@gmail.com.