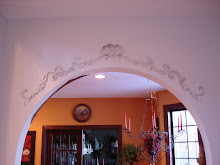
Cookie and Ed first called me in to do a faux finish in their bathroom. They loved this Southwestern style wall paper mural, but after a remodel it was floating awkwardly on the wall. I simply glazed the wall around it in a matching adobe finish, and extended a leaf detail from the mural out across the wall, just a bit.
 |
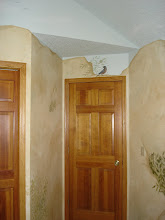
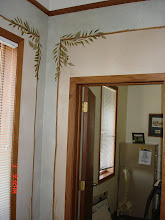
| I didn't paint this mural, just the wall around it, when the room was enlarged for wheelchair access. The trick here was to paint the base coat over the wallpaper, right up to the edge of the window, then match the finish to the little bit that shows at the top. The shadow hides the wallpaper edge on the side, and the bottom edge was sanded a bit to help it blend in, prior to painting. |
They were so pleased with this that they asked me if I had any ideas for the plain niches that held their favorite bronze statues. The rugged, western style sculptures needed something richer than a plain beige wall to set them off, and Ed thought perhaps a mountain mural would do the trick. I've done such things for taxidermy displays, but I wasn't sure, and Cookie was strongly opposed. As we talked, or rather as I babbled on, trying to keep up with the free flow of ideas that spews out of my brain at times like these, I said something about a rocky desert cliff face, and Cookie's eyes lit up. Seems the rock wall on the other side of the room was her consolation for giving up the stone fireplace in a recent remodel.
 |
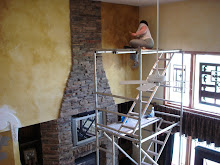
| Art niche with faux stone plaster finish. |
 |
| The real thing, except the color is a bit washed out here, and I couldn't get it back. |
Once the "stones" dry, I scrape over them with a taping knife, knocking off all the sharp points and shaping the edges, and then I give them a white or clear base coat, and let that dry. While it's drying, I mix several stone colors to match the real stone, and then start brushing it on, scumbling it into the divots and crevices, and blotting some back off. Every stone gets a bit of almost every color, though which is dominant varies from one to the next, and extra shading is added to some of the stones, making them appear to protrude much farther from the wall than they do. Sadly, this is where the camera knocks things flatter than they appear in person. Sigh.
 |
| This shot held onto some of the shading. If you squint, you might get back a bit of the shape the camera insists on flattening. :) |
Joy for me is in the details; the details of the jobs I do, the details of the lives of the people I meet, and all the little moments in a work day that confirm that I'm in the right place, doing the right thing. Whether I'm writing a kids' novel, illustrating a picture book, or decorating homes like this one, it seems my job is always to make stuff up, and if it's all made up, well, why not have fun and fill it with all the detail possible?
May your home, your work, your life overflow with joyful details!