|
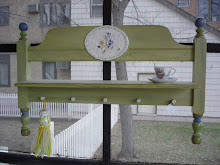
| In addition to the chickadee and hummingbird here, the panel has two more hummers in the vinery, and a dove at the base. The dove was originally a rabbit, but it somehow wasn't quite right, and after a few hours of sleep, I awoke knowing it had to be a dove, so I scraped off the bunny and started over. Since the circle starts there and the whole story comes back around to that point, and since Sharron is deeply spiritual, anchoring the piece with a dove not only looked right, it "felt" right. |
Recently, a woman who had seen the plaster in my bathroom during a tour of my home, asked if it had to be done on a wall. Sharron really wanted something very much like what I have, but she's likely to downsize from the home in which she raised her children, to a condo, in a few years, and she wouldn't be willing to invest her heart and money in this, and then leave it behind. Since I use paper clay for all kinds of art, I could tell her for certain that it is most certainly possible to do it on anything from wooden panels to plaster urns. (Look to the sidebar on this blog for the urn.) That was all she needed to hear, and after I made a quick visit to her home to get a feel for her personal style, she gave an enthusiastic green light to my sketches, and the fun began.
Oh, wait, no, the fun did not exactly begin. The process of creating a
stable, arched, seven and one half foot tall panel began. This is
Minnesota, and it was February. No possibility of doing woodworking
outdoors. No possibility of calling in my regular carpenter, as he was
wisely on his annual Mexico vacation, and hadn't left me the key to his
shop, which he'd have happily done, if he'd known I needed it. No
possibility of fitting this large a project in my tiny basement
workshop, which is sized for things like picture frames and footstool
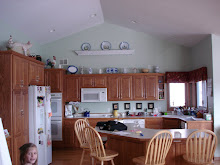
repairs. Nope, this one had to be built in that art room annex formerly
known as my dining room.
 |
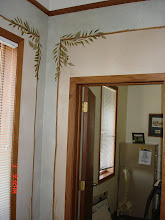
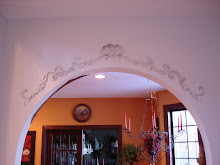
| Sure, I still serve dinner in this room, just not every day. Note the gilded fruit border to either side of the doorway in which the panel leaned while I worked on it. Same technique, different finish. |
I can't claim this is totally unusual. I often do quick bits of woodworking in here. I don't usually do quite this much cutting, though, and by the time I'd jig-sawed out all the curved pieces, and there are more than meets the eye, as there's a 2-by structure backing the plywood face, I was really wishing I'd closed more doors, and hauled out some dust sheets. It's not the end of my world, but let's just say my once every month or two dusting habit is not gettin' the job done these days.
So, once I had the panel built, I was able to start slinging paint. Oh, wait, no, once I had the panel built, I got to spend a few days doing a gesso-like process of turning the grainy plywood into a smooth surface, using a mixture of primer and joint compound, and sanding it (oh, joy, more dust), repeatedly. Then I got to start slinging paint. The background color is made up of five shades of blue, ranging from periwinkle to teal, plus a little bit of dark purple and deep rose. The palette was taken from favorite fabrics in Sharron's quilting stash.
(Oooh, you might like to see her quilts, huh? I'll see if I can get some pictures this weekend or next, and do a post on her!)
Instead of painting the color on the background with a brush, I troweled it on with a six inch taping knife, of the type used for drywall finishing, and an old credit card, of the type used for everything except actually purchasing things, plus a sponge, to soften and blend a bit, as needed. It's a very imprecise wet-on-wet technique, and I work and rework it until I like it. Sometimes it's quick, sometimes it takes awhile to "feel" finished. Finally, with the background paint done, I could attach the face frame, and begin sculpting.
 |
| In addition to this iris, the panel features delicate branches of wild rose blossoms and buds, and of course, a dandelion. Why a dandelion? Because. |
People are often surprised to learn that this is not created on a table, allowed to dry, and then glued on,. It isn't. The modeling of the clay happens directly onto the wall or object. Hmmm, instead of rewriting that whole technique though, let me go search the archives, and see if I can locate the post that shows it (now is the moment I regret witty blog post titles that don't actually say what the post is about)...
Aha! Here you go. If you want to see how it gets sculpted wet onto a wall, a wooden panel, or whatever, click here: sculpting scrolls, and to see that project completed, click here: Peacocks and periwinkle
 |
| The placement of the art high on the panel was so that it can be used as a headboard. Sharron and I also planned for the option of using it behind a dresser, or a demilune table. The face frame was intentionally scaled to match the width of standard trim, so that depending on where it is placed, it can appear at first glance to be part of the original architecture of most any home. Even the logistics of the future move were planned for during the design phase, so this piece is fully mobile. |
Sculpting in paper clay is truly one of my favorite techniques, and this piece is most definitely my current favorite thing. One of my other favorite things? Finding a way for a client to have their heart's desire. I so love saying "Yes!"
There's lots more in my portfolio of paint and plaster on my website, at theartofthehome.com, and of course, as you now know, if you see something you like, but you need it done a different way, just ask. Best way to reach me is via email, here: Just Ask