
 |
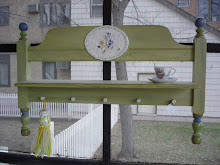
| It was a perfectly pretty periwinkle blue bathroom, just needed a bit of fancy on the shower curtain, some baseboard trim... |
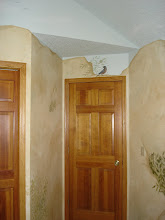
First I trowelled a pale aqua and a dusky purple, along with off white over the periwinkle, and liked the idea, but it was too gloomy. I was envisioning an artists painting of old plaster, catching interesting light, and these colors weren't suggesting any sort of glow. I took a break to go quote a job where wallpaper had been removed from an old stairway, and amazingly, what they wanted to cover up was almost exactly what I had spent the day trying to create! Still wanted a bit more color though, so I flipped through files of magazine clippings, and found several showing old European buildings with rosy pink plaster, glowing in the sun.
 |
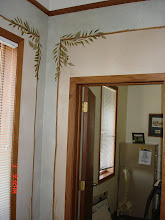
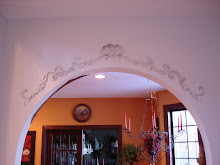
| Chalking in is the first step for sculpting plaster details. Actually, the first step is making sure you like the background paint, as it's a lot harder to change afterwards. |
I pulled a few colors of "oops" paint from the basement stash, and started again. A little trowel, a little brush, a little Woolie to blend the edges, seven colors of paint, two pots of coffee, three hours of sleep, and two audio books later... beautifully ruined walls! I love them. I really have nothing against solid color paint. A few rooms in my house still have it (for now). I just tend to prefer my colors a little overripe, and to my eye, that's best achieved by mixing them on the wall.
 |
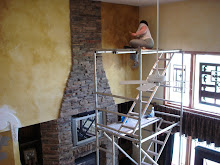
| Once the design is balanced, I cut away the paint where I want the plaster to stick. I don't know for sure, but I just suspect it will bite better into raw plaster/gypsum board than paint, so I always do this step. I also use Weld-Bond glue, which is a concrete bonding agent, to reinforce the connection.. |
Of course, this is only the backdrop for the detail work I've been planning in here for awhile. I've done several versions of squash blossom scroll work with hummingbird accents in client's homes, and had thought I might put it in the upper hallway here, but I think the plan instead might be giant painted flowers coming up the stairs and across the hall ceiling (this could change, but that's the current infatuation). The bathroom was the next logical spot. It took me some time (during which I took a time-out at Maureen's-scroll down to the last post) to figure out a good design, combining an art nouveau layout with a traditionally baroque style of plaster. I've sort of met in the middle, and in the early stages, it's looking promising. It better be, since it's permanent!
 |
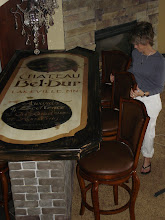
| So, here's the first bit of sculpting started. Using an air dry paper clay, which closely mimics the material variously described as plaster and papier mache in antique decorating books, I sculpt the design directly on the walls. When doing a mirror image like this, I try to alternate between one side and the other. They are never identical, but this keeps them balanced. |
If you think you might like hand sculpted plaster details, or overripe wall color in your home, you will find more samples, and information on how to hire me, on my website, theartofthehome.com.
Trying something like this yourself? If you have questions, feel free to email me, and I'll do my best to answer them. dawnmariedelara.@gmail.com


No comments:
Post a Comment