Ornamental Plaster Sculpting, Mural Painting, Faux Finishing, and Imaginative Interior Design.

Ornamental Plaster Sculpting, Mural Painting, Faux Finishing, and Imaginative Interior Design.
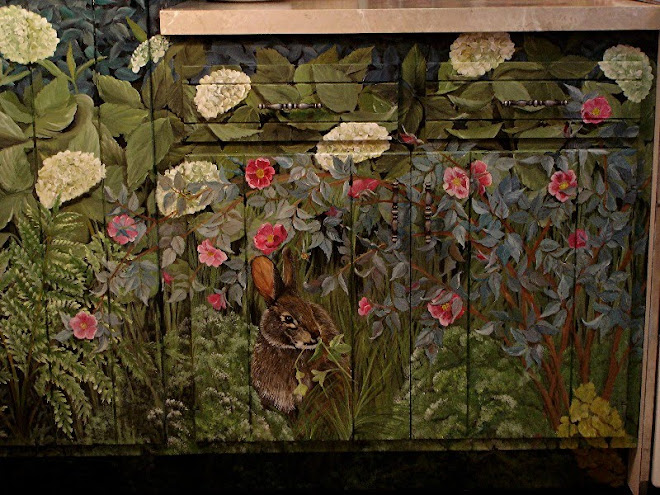
CLICK ON THE RABBIT ( yes, those are cabinets) TO SEE MY PORTFOLIO, AND LEARN MORE ABOUT MY SERVICES...theartofthehome.com

Tuesday, December 31, 2013

Auld Lang Syne (The Old Long Since)

May we always remember these days fondly, by the steps they build to the future we've yet to live.

2013 was, for me, a year of blessings and transformations, new adventures undertaken, new friends made, old friendships deepened, pleasures shared, treasures safely held onto, and a few dreams let go of.  A pretty typical year, by that description.

In reality, although my life isn't exactly typical ever, I'd say this year was exceptionally not so, thanks to some great friends... 

Cat Isles, author, patron, sometime business partner, and generous friend.

Cathy (Cat) Isles commissioned me to illustrate her children's book, Fruit and Veggies Aplenty!...


              **********************************************

During a writing assignment for an art class, I met a mouse named Lucie..

 Lucie loves bread and cheese, negligees, and Italy.  Wait, Italy?  I think that's a different adventure!
Lucie (along with a few other dear friends) helped me take a dream trip to Belgium and France....
I seem to have taken more pictures of bookstores than of the panoramic scenery.
I met a crew of kindred spirits in France...
Most of the merry band of revelers I spent a week with at La Cascade in Durfort, France.

Sing every Broadway tune ever written?  Sure!  Swear in French-a-la-southern -gal?  Sure!  Behave badly at the dinner table?  Repeatedly!

Oh, and we made books.  That was what the class was all about, after all. 
   *********************************************

And I reconnected with one of my dearest childhood friends in Belgium...

This is my childhood Bestie, with her two younguns.  If you listen to MPR, these are the faces on the other side of the microphone when you hear, "Reporting from Brussels, this is Teri Schultz."  Yeah, the boys are often right there with her, 'cause news happens in the middle of real life.
****************************************

And now I'm currently writing the final chapters of Lucie's adventures, Postcards From Lucie, a novel for middle-grades readers, and beginning to shop for a publisher!

Watch for Postcards From Lucie, coming soonish (we hope) to a bookstore near you.
*******************************************

With my friend Cat, I published three more issues of the magazine we started in 2012...
Cat with our friend and constant mentor, Maureen Carlson, in a 2012 photo.  We were too busy to pose for photos in 2013, I guess.
And then we let it go...a beautiful dream that was a bit too fragile to sustain longer, but that lived long enough to give me deep joy, new connections, and I must admit, great pride and satisfaction.  
******************************************

Those were just the brightest highlights.  I spent much of the year in the homes of wonderful clients, in and out of the studio with my Artgirl, Faithie, and enjoying the company of some of my dearest friends, a.k.a. "The Saturdays".  Of course, I'll continue painting and decorating for clients, but as those who've followed this blog over the years have surely realized, I'm doing less of those projects lately.  As you may have noticed from this post, I've fallen rather seriously (deeper) in love with books this past year, and I suspect my focus is going to shift even further in that direction in 2014.  Time will tell.  One adventure leads to another, and someday, these days will be the "Old Long Since".  I hope I'll still have all of you to swap tales with. 

May your new year be filled with deep love, bubbling joy, grand adventures, abundant prosperity, and the very dearest and sweetest of friends.


Tuesday, December 24, 2013

Don't lick the tree!

Last year's Christmas tree was a freshly cut, quirkily spindly spruce, decorated in a rustic, natural simplicity.  It was beautiful and peaceful, and I loved it.  This year however, with the outside of the house covered in frosting and candy, I had to do something sweet inside, as well, so the tree is a sugar-saturated confection.  Well, actually, it's mostly paint and glitter, though the cookies and candy canes are real.  Kinda wish I'd used a real tree this year too, as the fresh balsam would have smelled heavenly with the scent that wafts from the cookies...sigh.

Sugar coated Christmas Tree

Cupcakes in rainbow hues mingle with...
Ice cream cones in five different flavors, and...
chocolates, intermingled with...
Classic gingerbread hearts.
Of course, I always have to have a few words with my visuals!

Here's a peek at what's marauding as edibles:

Cupcakes are made by removing the satin thread covering those ubiquitous unbreakable ornaments.  These are always nearly free at most any thrift store, and waaaaay less expensive than buying new Styro balls.  Be cheap and green and recycle!  The frosting is created with cotton-type pads.  Quilt batting will work, but these thin little pads (I think they came from an industrial supply place) look amazingly real when stretched and hot glued to the ball.  The ball is glued into a cupcake paper, and then the "frosting" is tinted with a wash of thinned acrylic craft paint and sprinkled with iridescent fairy dust glitter, while still wet.  A dark pink pom-pom "cherry" was glued on top for a finishing touch.

Ice cream cones also start with those satin covered balls, though for these, you needn't remove the satin threads.  The ice cream is created with Sculptamold, which is a coarse plaster/paper mache material, available at nearly any craft store.  Just glop it on the top 2/3 of the ball, leaving a little lip to overhang the cone, like all the best ice cream parlours do.  Instant paper mache will also work, as will most air dry clays.   Once dry, paint with thinned acrylic paints, and sprinkle with fairy dust while wet.   The waffle cone is made from a quarter circle of tag board, covered in a lace doily, or scraps of old tablecloth or curtain lace.  Use a heavy coat of Mod Podge or white glue to stick the lace to the tag board, then saturate the top of the lace, too.  Without waiting for it to dry, paint this in caramel and brown tones of acrylic paint, and curve gently into shape.  Once dry, hot glue the quarter circles into cone shapes, trim the top edge a bit if desired, and hot glue the ice cream into the cone.  

Close-up of how the "ice cream" looks.  No need to be fussy, and in fact, they looked more real when I quit trying so hard to sculpt them.

The chocolates are simply brown pom-poms (made from thrift store yarn), some trimmed square, with snippets of ribbon, mini-gimp, and ribbon roses icing their tops.  I applied Minwax Polycrylic to both sides of candy papers to stiffen them, them coated the edge in gold paint, immediately dipped into gold micro-glitter, then hot glued the pom-pom chocolate in the center, with a hanging ribbon tucked under one edge. 

All of these are easy enough for pre-teens to create, and Artgirl helped with some.  Others I worked on at Friday Open Studio, at Maureen Carlson's Center for Creative Arts, though I had to guard them closely from my so-called friends, who were like kids ogling the cookie jar before dinner.  Click the link to Maureen's for Open Studio info.  If you're in the metro area, come join us!

However you decorate, however (and whatever!) you celebrate at this time of year, may your holidays be filled with sweetness and light!

Wednesday, December 18, 2013

Sugar Shock

   Christmas brings out the kid in me.  Okay, yeah, I know what you're thinking.  Tuesday brings out the kid in me.  Waking up in the morning brings out the kid in me.  Fine, yes, we all know my inner 3-year-old runs the show.  Still, I don't usually get to play this much.  I took a break from writing these last couple of months (blogs books, and bookazine), to get life back in balance. (Thanks for the emails, cards and messages, dearest hearts.)  Seems I'd forgotten what it was like to end the workday at 6, instead of whenever I finally fell asleep on my feet, or at the computer.  Still, my idea of relaxing rarely involves turning on a television, and with audio books I can get my lit fix and do stuff, so here's what I did with my Monday afternoons, my weekdays when I had no paint jobs booked, many, many evenings, and most weekends for the past two months...
GingerBelle!
   Gingerbread is a big Christmas tradition for me.  Actually, it's about my only tradition, except for stockings (yeah, still).  I don't have a big stash of sentimental ornaments, so I decorate my trees in different themes every year.  I celebrate in different ways, depending on who I celebrate with.  Growing up, I couldn't eat my family's traditional clam chowder, so I don't have a gotta-have-it Christmas meal.  But I always bake gingerbread.  

   Most years, it's just cookies, but when I have time, I love making gingerbread houses.  The largest one I ever made was a scale model of my parents Victorian era farm house, back when I was in high school.  It was over 2 feet tall, had candy glass windows, and a light inside that glowed through them.  My mother had visions of an architect in the family.  I simply had visions of sugarplums (too bad Cake Wars hadn't yet debuted on television, or I might have had visions of becoming a sugar chef).  Sorry Mom.

   I've wanted to turn Belle (short for Belle Amie...yes, I gave my house a name...if you met her, you'd understand...) into a gingerbread confection for a few years now, and with the help of my Artgirl, Faithie, it finally happened.  Faithie has made a couple of gingerbread houses herself, and is something of an expert on candy, or at least emptying my candy jar, so she was the perfect partner for this venture.  After some initial sketching, brainstorming, and measuring, we figured out the recipe:

Frosting.  Batches and batches of frosting.
Mix 25 strips of muslin into 4 gallons of thinned paint, shape as desired, and let dry for three days.  May need to be made in batches, if space is not unlimited.
   Faithie and I tried spray foam insulation to make frosting, but the foam was difficult to spray in the shape desired, and one can only made a single strip.  We needed 25.  Not friendly to the budget nor the environment, so we nixed that.  I had a mountain of recycled muslin panels, and I knew dipping fabric in paint would make it shape-able.  It took a few tries to come up with something that looked like frosting and didn't take more than 15 minutes per segment to shape.  We tore the muslin into 18 inch wide by 15 foot long strips, dunked each into slightly thinned paint (which I mixed from "Oops" paint and job left-overs, then tinted), then scrunched them with our fingers on a plastic sheet laid on the dining room table.  There was only room for six pieces at a time, and each batch takes several days to dry, so as usual, Thanksgiving dinner didn't happen here.  

Candy.  You need lots and lots of candy
To cook up these, cut discs from 2" thick Styrofoam about 12 times the normal size of the candies you wish to create.  Shape with serated knives, and by sanding with scrap pieces.  Paint as desired.  Make more than you think you need.
   My goal was to make everything for this project from stuff I already had.  Unlike most folks, I used to work in the event industry creating theme party decor, so I happen to have a large stash of stuff like Styrofoam.  All the mints, M &Ms, and candy canes were made of Styro.  If I'd not had this, I'd have gone the stitched-stuffed-and-painted muslin route.  Once shaped, and once you vacuum off all the styro bits clinging tenaciously to your clothing, the round candies are painted. However, to create the stripes on the candy canes, I dipped a few yards of muslin into red paint, spread it out flat to let it dry, cut it into strips, then pinned those onto the canes.  Waaaayyyy easier than painting spiral stripes on styrofoam.

Gumdrops.  Faithie wanted gumdrops.

Gumdrops require circles of muslin, all the empty hanging planters to be found in two garages, large stones and strong twine for wind resistance, cotton batting, tape, paint in gumdrop colors,  and iridescent flitter (large size glitter).

Dunk fabric in paint, wring out a bit, and drape over  pots.  While still wet, sprinkle liberally with flitter for a sugar effect.  When dry, trim the fabric even with the rim of the pots.  Do not finger paint your sister.
  When making large batches of giant candy, I find it's always good to employ child labor.  If you have none of your own, do what I do, and borrow them from other people.  They will usually work for candy, so stock up on Starbursts and Skittles, and brace yourself for an energetic afternoon. 

Lollipops and Candy sticks.  At least a few.
For lollipops you need large Styro balls (never turn down the junk your friends offer, if you have room in your basement to store swell stuff, as you never know when you will need things like giant foam balls), acrylic craft paint, cellophane, wired ribbon, and large dowels or old curtain poles.  Candy sticks are made of cardboard tubes. acrylic or latex paint, and colored tape.
   The lollipops were the first thing Faithie thought of, and we made them in no time at all.  We painted the balls in her choice of colors.  We used a cordless drill with a paddle bit to make a deep hole in the foam ball, then put a bit of hot glue on the rod and inserted it.  It's a good thing we made them early, as the ground was already starting to freeze.  We had to put them up way before anything else, which must have had folks wondering what we were up to.  We also dug a hole for a 2x4 that the candy stick sign post slides over.  We get really high winds, and I wanted to be sure the ELVES AT WORK sign (another of Faithie's ideas), didn't end up down at the donut shop.  It's made of thin plywood and attached with long screws and large washers.
It's not child labor if her parents are paying me to teach her stuff, right?  What, you never used a post hole digger in art class?

Elves.  Faithie said we had to have elves...and a sign...
Work?  Play?  Eh, same dif.
Ingredients for making an elf:  Left over 3-strand house wire, duct tape (you didn't think this whole project could have happened without using duct tape somewhere, did you?), one toddler sleeper (okay, I did have to buy that...thrift store for 2 bucks), quilt or snow batting, one small pair of gloves, fabric for tunic, hood and shoes (an old curtain panel did the trick here), a foam mannequin head or large foam ball, feathers for hair, hot glue and acrylic paint.

We intended to make three elves, but they take a fair bit of time to construct.  Also,  I had only one mannequin head, and no desire to sculpt heads from scratch for this, two months being all the time I had for the whole project.  The basic idea is to create a stick figure from stiff wire, including fingers, and with a long neck.  Use duct tape to hold strands in place, as needed.  Insert the figure into the sleeper, and stuff with batting.  Put a little padding in the fingertips of the gloves, and wrestle them onto the hands.  If you were making a more permanent soft sculpture, you would wrap the wire in batting and muslin strips and stitch things in place.  That's a whole different thing.  This is Prop Making 101.  

To dress the elf, the tunic is a rectangle with a slit for the head cut in the middle, edges trimmed.  The hood is another rectangle folded in half, trimmed a bit in back, and hot-glued along the seam line.  Shoes are made of three pieces of fabric, hot glued rather than stitched. to save time.  Everything was belted with ribbons, and the hood was pinned into the head to hold it in place.  Oh, the head!  I did shape it a bit by pressing a paint brush handle into the foam, then I painted the face, and glued some craft store feathers on for hair.  I drilled a hole into the neck and pushed it onto the wire neck of the body structure.  Don't glue if you want to be able to turn the head.  She's wired onto the ladder for wind (and prankster) resistance.

You should note that as far as paint for this project goes, we didn't worry about interior/exterior/house/craft.  Any acrylic will hold up fine unless you're in a really rainy climate.  I've painted quick "temporary" signs from interior wall paint and craft paints which got left out for years, year round.  Use what you have, or what you can salvage.

So there's our recipe for a gingerbread house.  We'll add a few ingredients next year, since there were a few things we didn't have time for.  Also, the attic windows didn't get any frosting, mostly because I've never opened them, and I thought it perhaps best not to test the old hinges and latches in the dead of winter.  See, I think these things through.  Well, most things.  Like, I thought to put the second storey frosting and candy up before the roof got snowed on....just didn't really think about needing to get it down from the snowy roof in January.  Hmmm... If we don't get a January thaw, I may be taking it down around St. Paddy's day!  Fa-la-la-la-leprechaun!
Artgirl, a.k.a. Faithie.  Best elf.
I love this kid!
So, yes, I'm back to blogging.  Check back here next Monday for a peek at my Christmas tree, if this wasn't sugar enough for you.  In keeping with the sugarplum vision, I covered this year's  tree in cupcakes, candies, ice cream cones and cookies. It's almost as sweet as Artgirl.

If you're wanting sweet paint for inside your house, check out my portfolio of possibilities at theartofthehome.com.  I'm still booking January paint dates.

Questions or comments can be left below, by clicking where it says comments.  

I took the in-progress shots, but Steve Isles was kind enough to come down from Jordan and shoot the afters, including pics of Faithie and I together.  Of course, it had something to do with it also being dollar burger day at Johanne's Bar and Grill, just around the corner.  Whatever the motivation, thanks Steve!

Tuesday, September 3, 2013

A little decorating job...

Way back at Easter, a friend's granddaughter, Lauren, got another miniature La La Loopsy doll in her Easter basket, and I was instantly enchanted by the box it came in.  Apparently, I never outgrew the toddler fascination with the box thing.  Anyway, in case you aren't up on who's who in Toyland, La La Loopsie is the currently popular pocket sized doll, having taken over for Polly Pocket, or quite similar to the Kiddles of the early 70's, if that's more your era.  

La La Loopsie house made by Artgirl, Faithie.
I'm not so fond of the plastic mass production quality of Loopsies, but according to the earlier company press releases, part of the idea was to encourage imaginative recycling.  Of course, they then went on to make a whole line of plastic accessories that look like they came from the (fake) scrap bag, so no child need ever create anything.  Sigh.

Here, Faithie makes window boxes from the packaging that uphostery tacks came in.  I have a small drawer in my studio where I toss these, and other little bits of packaging that strike me as reusable.  We used a lot of Fabri-tac, but you can also use Sobo for gluing down the fabrics.  Hot glue is good for structural things, like holding floors in place.
As I said, my imagination was immediately caught by the little house shaped package that the mini-Loopsy came in, which though printed cardboard, was originally designed with bits of fabric, buttons and trim.  I wanted to make one, and Lauren offered to let me borrow the box...on the condition that I give her the house I planned to make.  Fair enough.  I never really played with doll houses, but I've always liked creating them.  As if having a full sized one of my own, and hundreds of clients to decorate for isn't enough?  I think it's the instant gratification of rooms that take hours, not days or weeks to finish.  Or maybe the fact that the inhabitants are mute, and I can inflict whatever wild ideas I want upon their walls.  At any rate (actually at a very slow rate), five months later, I finally finished.  So much for the instant gratification theory.

La La Loopsie gets a roof-top living room, complete with bookcase, and big comfy flower chairs, plus a few silk flowers potted in beads.
Of course, I haven't taken photos of my Loopsy cottage yet, so the photos here are the one made by Artgirl, Faithie, instead. She was wanting to make a wooden doll house last spring, but agreed to start with this first. She finished hers in several two hour stretches over the course of a month, creating it from a cardboard box, bits of fabric from several sources, including some custom designed by her mom, Jill (who didn't used to think she was an artist, but that's a whole other saga -- click her name to see what she has on Spoonflower).  Along with fabric, Faithie and I both used lots of wooden spools, empty plastic packaging, tiny boxes like the ones vanilla bottles come in, and vintage trims that I collect from thrift shops and garage sales.  Oh, and flowers.  Lots and lots of silk flowers, of course.

We decided stairs would take up too much space, so Miss Loopsie has to muscle her own way from floor to floor.  Faithie did buy the dresser premade at a craft store, and just added trim to the front.  Otherwise, all the furnishings were made with recycled boxes and bits.
 I had thought this would be a quick warm-up for the construction of the wooden doll house, but Faithie is a fiend for details, and took her time making this house both sweet and sturdy enough for her little sister and their friends to play with.  By the time we finished, she didn't want another dollhouse, she wanted a play house, so we built that from wood, instead.  Yes, that's a link to a post with photos of that project.

Love the refrigerator?  I don't recommend you cover yours in fabric, but you can paint it.  Bonding primer under and Minwax Polycrylic over your paint job will make it last for years.  Actually, now that I think about it,  with bonding primer under, and LOTS of polycrylic over, I guess you could cover yours in fabric.  Go for it!  (send me pictures!)   In this kitchen, refrigerator, table and stove are covered in Jill Lenzmeier fabrics (link above).
Sometimes we really can't do exactly what we want in our own homes, maybe because we have to compromise with someone else's sense of style, maybe because the budget won't accommodate, maybe because we like far more styles than we have rooms under our roofs.  Miniature domains, like doll houses and fairy abodes, are a fun way to play around with these fantasies, and if like me, you find the joy is just in the making, the final result can also be a perfect gift for a child.  If you're thinking of Christmas, however, I suggest you start soon.  The details can be reeeeeallllly time consuming!

"Artgirl" Faithie with her beautifully designed and executed La La Loopsie house.

Have a fun week, whatever you do.  Hopefully I'll pop something new up on Friday morning, but I'm really late getting the autumn issue of 365 Being to the printer, so I may be taking a break from posting here for a week or so.

Friday, August 30, 2013

Travelling With Lucie

Well, I thought I'd write a decorating post today, but there was someone else on my travels who certainly deserves her own post.  You've seen bits of Lucie's adventures in some of my other posts this summer, but she stared at me this morning until I agreed to give her a post of her own.  She's still staring at me, of course, but with the guilt beam deactivated.
Staying in a castle with a moat suited Lucie's sensibilities just fine, just so long as the swans kept their distance -- they're mean!
You can learn all about Lucie on her website.  (As of August 2013, I haven't had a chance to update the site.  Lucie is not sending postcards at this time, so if the postcard purchase page is up whenever it is that you happen to read this post, be sure it's a promo for a current trip.)
Star and Chronicler, in France.
Traveling with a mouse and photographing the trip from her perspective, as her chronicler, was a fun assignment I gave myself.  Part of the fun was that it took me out of my comfort zone, and gave me an excuse to do kid things, like lay on the platform of the subway station in Brussels.  I didn't do it for the reason a kid would, but rather to try to get a shot from a mouse's perspective, but you shoulda heard my friend, Teri.  She put on her mom voice and sternly informed me, "If you do not get up this instant, I'm going to leave you here."  Of course, her two kids were with us, and I was setting a bad example, so she would have been justified, except that I warned her I was coming to visit just so I could instill properly naughty behavior, and she assured me she had done it already.  Sheesh.
Would have liked to have gotten a shot at a better angle, with a train arriving, but small Kai was already freaked out by Lucie crossing the yellow line.  Figured it wasn't the place to set a really bad example for small boys, and besides, I was at risk of being stepped on...or left behind..  
Teri's boys loved Lucie, especially Soren, the older of the two.  He was so good about letting her sit on his shoulder, so I could try to get shots of her gazing at all the tourist attractions.  (If only I'd figured out the camera settings for doing this effectively [sigh].) Of course, there was the day at the farmer's market, while we rested on a bench, that Soren did ask, "Could we put Lucie away now?  It's getting kinda embarrassing being seen with a mouse."
The violinist seemed to like Lucie as much as she liked him, and Soren was a darling about his job as Lucie's personal prop.  Unfortunately, it didn't occur to me to turn them around and get their faces anywhere, like normal tourists would do.  Sorry Soren,  Lucie and I would have loved a few shots with your sweet smile.   Ah well, maybe next time...?

Lucie and Kai contemplate their odds of getting away with pretending they don't know what that sign says.
I do believe Lucie impressed the Faerie folk in the woods behind the castle, with her refined ways and fancy clothes.  Lucie wanted to know if I actually believe faeries are real.  Like I wasn't conversing with a mouse in a negligee???
You see a beautifully carved antique mirror frame.  The four cats see a tasty little treat, just out of reach.
 In France, my classmates, who were all my age and older, seemed to delight just as much as the boys had in dreaming up adventures for Lucie.
Lucie did think about rafting down the copper cooling rivulet, but it's swift and cold, and empties into a fast moving river.  She's adventurous, but not extreme, thank goodness.

One day we got locked out, and Lucie looked for ways in.

Waiting for the postman.  

Lucie thought the cheesemaker's son might want to befriend her, as Kai and Soren had, but I didn't think his papa would go for having a mouse about the business.
I'm chronicling Lucie's story as a serial (for now) in my quarterly bookazine, 365 Being.  You can get the first installment in the summer issue, in PDF, and at the time of this post, there are a few print copies left, as well.  Eventually, the story will get a proper editing, and publish as a novel for young readers.  Eventually.  

For now, I'm hard at work trying to get the last photo albums out to the kind souls her helped fund Lucie's adventures (Thank you, my darlings!!!), while also trying to get the Autumn issue to press, between my regularly scheduled decorating work.  It's all one big adventure!  Have a fun weekend, and check in on Tuesday morning.  Who knows, with summer ending, maybe I really will get back to posting about decorating...