...because that's what I do!
 |
| Flat 50's goes rustic, with a bit of elbow grease and some glaze. |
My client Alison loves the hand painted furniture of Henredon, and through vigilant craigslist shopping, she's collected some nice pieces. Her home is traditional, leaning toward French Country, though a bit more streamlined than a lot of my French Country loving clients. The fact that she's a professional organizer probably explains that, or maybe she's always been this tidy, which is why she's an organizer...hmm, well, suffice it to say, this was not a job where I had to trip over backpacks or step on legos. Big plus!
 |
| First sand... |
Another great thing about this project? Alison wanted more than fit in her budget, so she agreed to help me with all the prep. This doesn't always go very well, as some clients mean well, but they spend much of the day answering their cell phones, and stopping to run errands, and I still do most of the work at a discount price. Grrrr. Not Alison! She's used to hard work and she keeps her word, so I got out of a whole day of prep and sanding, and most especially, CLEAN UP! Mega bonus for me!
 |
| ...then glaze |
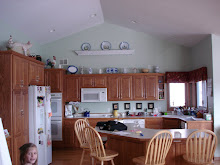
Alison's house was built in 1958, in a very nice neighborhood. It's a split level, with the traditional styling of that era, which means it was well built, but nearly devoid of personality. Over the years, she and her husband have added charm, and recently, they took on the kitchen, replacing the appliances, sink and counters. Now, Alison doesn't buy cheap crap, and she doesn't waste money, so it didn't make sense to her to replace the sturdy but plain cabinets. She knew who to call for those.
 |
| A bit of extra umber will help hide the fact that the new hinges are just a breath smaller than the old ones. |
After a short conversation, we agreed to create a finish similar to one of her rustic painted pieces. Because we wanted to just sand back the existing finish and add a glaze, I chose to use Benjamin Moore's acrylic D.T.M. The ultra base, usually used for mixing dark colors, works great as a glaze, and it bonds well to most acrylic paints. When putting new paint over old without a bonding primer, always do a test first. Give things a week or two to cure, and try scratching it. You shouldn't be able to separate the new from the existing.
 |
| Silly Robin built her nest in the window box right outside from the kitchen sink. |
Alison hit the cabinet cases with the sander to show me how much distressing she wanted, and then I took over and did the doors, while she wiped them clean. The next day, I mixed a yellowish tan to simulate the yellowing of old oil paint, and an umber to mimic tanin bleed, then alternated brushing and wiping until it looked right. While I finished the last of the doors, her husband was installing the first ones, and Alison was practically crowing with delight. Exactly the look she wanted at a fraction of the cost of new.
 |
| Hopefully her four eggs will still hatch, since she flies away almost everytime anyone uses the sink. She was braver on the colder days, and stayed put, so maybe it will be okay. |
It's not the right look for everyone, but Alison has been collecting this style of painted furniture for longer than I've known her, which is something like eleven years, so there's not much chance she'll get tired of the cabinet finish anytime soon.
Painting your cabinets is a great way to get more from your kitchen remodeling budget, as long as the cabinets are well positioned and well built. You can see examples of other styles of cabinet paint finishes on my website, theartofthehome.com.














No comments:
Post a Comment