
 |
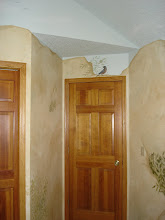
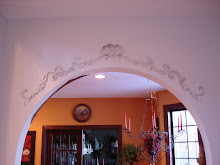
| "Tobacco Leather" bagged glaze |
 |
| Mask everything. Use 2" wide tape, tan on popcorn ceilings and woodwork, blue on delicate painted surfaces. Put down drop cloths, fill a bucket of water and round up a few rags to keep handy. |
 |
| Prep your tool. This will give you better results, allow you to work faster, and make the job easier than trying to just hold a scrunched up bag in your hand. Wrap a Woolie tool or a grout float with tan masking tape turned sticky side out. Turn a couple of plastic grocery bags inside out (otherwise the ink will transfer to your wall) and scrunch them onto the tape, creating as much texture as possible. |
 |
| Once you are ready to paint fast and without stopping, using slightly thinned glaze, cut in the edges of a section about one yard or meter square. Notice I use more of a squishing motion, rather than brushing it in the usual way, which could leave lines. |
 |
| Roll paint on, then starting tight in the edges, pat quickly with the tool, a little for loose large pattern, a lot for finer pattern. Roll the next section, just meeting, but not overlapping, and pat this seam first, then the rest of it. This is not a forgiving technique, and overlap marks will show. On a larger wall, keep a damp rag handy and wipe it over the surface ahead of you before rolling on the glaze. This will keep it wetter longer. Also vary the size shape and edges of the patches you roll on, so if you do get laps it isn't as obvious. |
 |
| Paint tight spots by dabbing with an artists brush. In really small areas, you may not even need to press plastic into it. Pull tape, clean any sneaky glaze off of the ceiling edge, and touch up any unglazed spots that might show up along the baseboard and in corners. Done. |
 |
| If you put your switch plates back on right away, wait a few days to tighten the screws, to keep them from sticking to the glaze. |
One is to not try to go around inside corners. It almost always looks better to work on side walls, then come back to dry edges, mask the corner with blue tape, and do end walls.
If you have someone work with you, have them wipe with the damp rag and roll on the paint just ahead of you, so you can just keep working the bag.
You will need to wipe excess glaze off of the bag fairly often, so have a few rags handy for this.
Don't let paint start to dry on the bag, or you will get little paint boogers stuck in the next part you pat it onto.
If paint gets on your textured ceiling, it usually is best to let it just barely dry and pick it off with a fingernail, rather than trying to wipe it off wet, whicn almost never works.
Start in the least visible spot in the room, and finally, if your first attempt is going badly, wipe it off quickly, take a break, tweak your glaze if you think it might need to be a bit thinner or thicker, and start again.
City loft or country cabin, formal dining room or cowpoke's nursery (or just in a typical suburban master bedroom), leather is always stylish. Try it!


No comments:
Post a Comment