I have always loved Arts & Crafts era tiles, especially those glossy majolica looking ones, with leaves and frogs and pine cones, coated in gorgeous, glossy glazes. Not exactly an easy find on the alley shopping circuit, and reproductions exist, but they're too spendy for a powder room that will probably be replaced with a 3/4 bath in a few years. They're not that hard to mimic, though...just time-consuming.
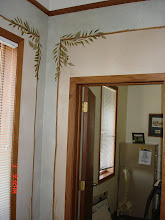
Mask off all trim, prime with oil-based bonding primer, trowel joint compound on random tiles, and stamp with foam leaf stamps (from the craft store). Let dry, and smooth the imprints with a damp rag.
 |
| Before painting, you want to rub down the edges of the square, and the lip around the stamp. This is easier when the compound is just dry. |
Roll a good coat of paint back over everything. Hmmm...looks like the same weird green as the original. I'm headed for nice mossy tones in the end, so this pale greenish gold is a good base.
Scumble raw umber glaze into the leaf imprints, then wipe across the top with the palm of your hand, to clean it off of the details and the border. Next, apply glazes in the colors of your choice ( I used ocher, raw umber, and two shades of mossy green), using a paintbrush and a damp sponge. Not quite like sponge painting, where you use the sponge's texture to print, but smooshing the glazes together with the sponge, working them until they resemble your favorite vintage tile colors. You can paint in the grout with a liner brush. I tried classic white, but it didn't look right, so I decided my tile was dry-fit, with grungy joints. As Bob Ross always said "It's your own little world, paint it how you like it!"
Now, I just have to finish the rest of it, give it a couple coats of Polycrylic to gloss it up and protect it, then decide what I want to do about the black band at the top, and the wall above, and replacing the lighted medicine cabinet with a chandelier and pretty mirror, and then I suppose I better finish fixing the floor so I can install the toilet. If you need me this weekend, you know where to find me.
If you want to try this at your home, and need more detailed instruction, email me with any questions. dawnmariedelara@gmail.com













No comments:
Post a Comment